





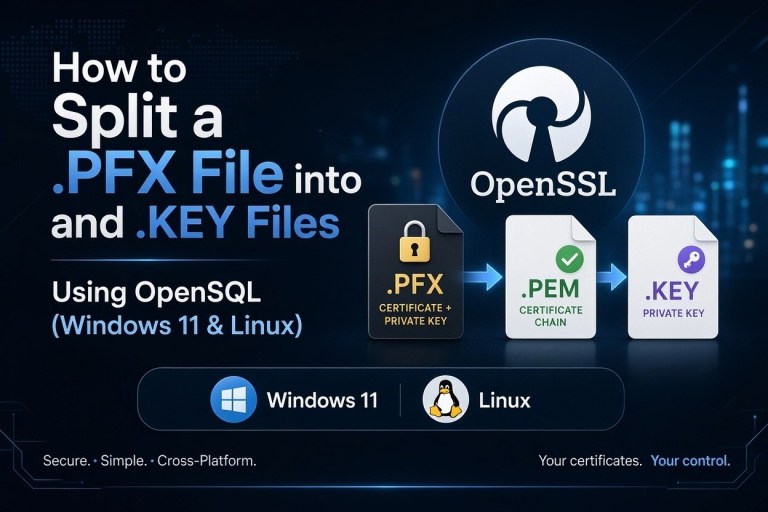
SSL certificates are essential for securing websites, applications, APIs, and web servers. However, depending on the server or application you are configuring, you may need your SSL certificate and private key in separate files instead of a single .pfx file.
If you have a PFX certificate and want to extract its certificate and private key separately, OpenSSL makes the process simple. You can use a few commands to convert a PFX file into individual PEM and KEY files on both Windows 11 and Linux.
In this guide, you will learn how to split a PFX file into PEM and KEY files using OpenSSL, how to install and verify OpenSSL, how to extract the SSL certificate and private key, and how to troubleshoot common conversion errors.
Whether you are configuring an Nginx server, Apache, a hosting environment, or another application that requires separate SSL certificate files, this step-by-step tutorial will help you complete the process.
What Is a PFX File?
A PFX file, also known as a PKCS#12 file, is a certificate archive format that can contain multiple SSL/TLS components in a single file.
A typical PFX file contains:
- SSL certificate: The public certificate issued by a Certificate Authority (CA).
- Private key: The confidential cryptographic key associated with the certificate.
- Intermediate certificates: Additional certificates that help establish the certificate trust chain.
- Optional password protection: A password used to protect the contents of the archive.
PFX files commonly use the .pfx or .p12 extension. They are frequently used with Microsoft Windows servers, IIS, and other certificate-management systems.
However, some web servers and applications require separate certificate and private key files.
This is where OpenSSL becomes useful.
What Are PEM and KEY Files?
Before converting a PFX file, it is helpful to understand the difference between PEM and KEY files.
PEM file (.pem)
A PEM file is a Base64-encoded format used to store certificates, private keys, and certificate chains. An SSL certificate stored in PEM format usually starts with:
-----BEGIN CERTIFICATE-----
KEY file (.key)
A KEY file generally contains the private key associated with your SSL certificate.
Depending on the key algorithm and encoding, it may begin with:
-----BEGIN PRIVATE KEY-----
or:
-----BEGIN RSA PRIVATE KEY-----
The private key must remain confidential. Anyone who obtains the corresponding private key may be able to impersonate your server or compromise services that rely on that certificate.
For this reason, protect your .key file with appropriate permissions and secure storage.
Requirements Before Converting PFX to PEM and KEY
Before starting the conversion, make sure you have the following:
- A valid
.pfxor.p12certificate file. - The password associated with the PFX file, if it is password-protected.
- OpenSSL installed on your Windows 11 or Linux machine.
- Access to the folder containing your PFX file.
- Permission to read and export the certificate and private key.
For this tutorial, we will use the following example filenames:
- Input file:
certificate.pfx - Output certificate:
server.pem - Output private key:
server.key - Output CA chain:
ca-chain.pem
Replace these example filenames with your actual filenames.
Step 1: Install OpenSSL on Windows 11
If you are using Windows 11, you first need to install OpenSSL.
You can install a Windows-compatible OpenSSL distribution using a trusted installer, or use an existing OpenSSL installation provided by your development environment.
After installation, open Command Prompt or PowerShell.
Check whether OpenSSL is available by running:
openssl version
If OpenSSL is installed correctly, the terminal should display the installed version.
For example:
OpenSSL 3.x.x
If Windows displays an error such as 'openssl' is not recognized as an internal or external command, OpenSSL may not be included in your system PATH.
In that situation, you can either:
- Add the OpenSSL
bindirectory to your Windows PATH environment variable. - Navigate directly to the directory containing
openssl.exeand execute the commands there.
For example, if your OpenSSL installation is located in C:Program FilesOpenSSL-Win64bin, you can navigate to that directory:
powershell
cd "C:Program FilesOpenSSL-Win64bin"
Then verify the installation again:
powershell
.openssl.exe version
Step 2: Install OpenSSL on Linux
Most Linux distributions provide OpenSSL through their package managers.
Depending on your distribution, use the appropriate command.
Ubuntu or Debian:
sudo apt update sudo apt install openssl -y
CentOS, RHEL, Rocky Linux, or AlmaLinux:
sudo dnf install openssl -y
On older systems that use YUM, you may need:
sudo yum install openssl -y
After installation, verify the OpenSSL version:
openssl version
If the command returns an OpenSSL version, you are ready to continue.
Step 3: Locate Your PFX File
Before running the conversion commands, navigate to the directory containing your PFX file.
For example, on Windows 11:
powershell
cd "C:Certificates"
On Linux:
cd /home/user/certificates
You can check whether your PFX file exists by running:
Windows:
powershell
dir
Linux:
ls -l
Make sure the filename is correct before proceeding.
Step 4: Extract the Private Key from the PFX File
The first step is to extract the private key from your PFX certificate.
Run the following OpenSSL command:
openssl pkcs12 -in certificate.pfx -nocerts -noenc -out server.key
Let's understand the command:
openssl pkcs12: Uses OpenSSL to read a PKCS#12/PFX archive.-in certificate.pfx: Specifies your input PFX file.-nocerts: Prevents certificates from being included in the output.-noenc: Writes the private key without output encryption.-out server.key: Saves the extracted private key into a KEY file.
OpenSSL will ask you for the import password of your PFX file.
Enter the correct password and press Enter.
After successful execution, OpenSSL will create:
server.key
Important security note: The -noenc option creates an unencrypted private key. Use it only when the destination application requires an unencrypted key. Restrict access to the resulting file and avoid sharing it through email, public repositories, or unsecured storage.
If you prefer to keep the extracted private key password-protected, omit -noenc:
openssl pkcs12 -in certificate.pfx -nocerts -out server.key
OpenSSL will prompt you to create a password for the exported private key.
Note: In older OpenSSL versions, -nodes is commonly used instead of -noenc. The -nodes option has been deprecated in OpenSSL 3.0, so -noenc is preferred for current versions.
Step 5: Extract the SSL Certificate from the PFX File
Now that you have extracted the private key, the next step is to extract the SSL certificate.
Run this command:
openssl pkcs12 -in certificate.pfx -clcerts -nokeys -out server.pem
Explanation of the command:
openssl pkcs12: Reads the PFX/PKCS#12 file.-in certificate.pfx: Specifies the source PFX file.-clcerts: Selects the client or end-entity certificate rather than CA certificates.-nokeys: Prevents private keys from being exported.-out server.pem: Saves the certificate in PEM format.
Enter your PFX password when prompted.
After successful execution, you should have a new file:
server.pem
This file contains the certificate in PEM format and can be used by applications that require a separate SSL certificate.
Step 6: Extract the Intermediate and Root CA Certificates (Optional)
Some servers and applications also require the certificate chain.
The certificate chain may include intermediate Certificate Authority certificates and, depending on the archive, other CA certificates.
To extract the CA certificates from your PFX file, run:
openssl pkcs12 -in certificate.pfx -cacerts -nokeys -out ca-chain.pem
Explanation:
-cacerts: Selects CA certificates instead of the end-entity certificate.-nokeys: Prevents private keys from being exported.-out ca-chain.pem: Saves the CA certificates in a separate PEM file.
This creates:
ca-chain.pem
Keep in mind that not every PFX file contains the complete certificate chain. If the file does not include the required intermediate certificate, you may need to obtain it from your Certificate Authority.
Also, the -cacerts option extracts CA certificates; it does not guarantee that every certificate in the resulting file is a required intermediate or trusted root for your application.
Step 7: Verify the Extracted PEM and KEY Files
After extracting the certificate and private key, it is important to verify that both files were generated correctly.
Verify the SSL certificate:
Run:
openssl x509 -in server.pem -noout -text
This command displays information about the certificate, including:
- Subject
- Issuer
- Validity period
- Public key information
- Certificate extensions
You can also display the certificate's subject, issuer, and validity dates using:
openssl x509 -in server.pem -noout -subject -issuer -dates
Verify the private key:
Run:
openssl pkey -in server.key -check -noout
If the private key is valid and readable, OpenSSL should report that the key is okay.
If your private key is password-protected, OpenSSL will prompt you for its password.
Verify that the certificate and private key belong together:
You can compare their public key information using these commands:
Extract the public key from the certificate:
openssl x509 -in server.pem -pubkey -noout
Extract the public key from the private key:
openssl pkey -in server.key -pubout
The resulting public key information should match.
This is an important verification step before installing the certificate on your web server.
Step 8: Check Your Generated Files
After completing the conversion, your directory should contain the following files:
certificates/ │
├── certificate.pfx ├── server.pem ├── server.key └── ca-chain.pem
Here is what each file contains:
| File | Description |
|---|---|
| certificate.pfx | Original certificate archive |
| server.pem | Extracted SSL certificate |
| server.key | Extracted private key |
| ca-chain.pem | Extracted CA certificates, if present |
You now have separate certificate and private key files that can be supplied to applications requiring PEM-based SSL configuration.
Complete OpenSSL Commands to Split a PFX File
If you want to perform the entire PFX-to-PEM and KEY conversion without following each individual explanation, use these three commands:
1. Extract the private key:
openssl pkcs12 -in certificate.pfx -nocerts -noenc -out server.key
2. Extract the SSL certificate:
openssl pkcs12 -in certificate.pfx -clcerts -nokeys -out server.pem
3. Extract the CA certificate chain:
openssl pkcs12 -in certificate.pfx -cacerts -nokeys -out ca-chain.pem
These commands work on both Windows 11 and Linux, provided OpenSSL is installed and accessible from your terminal.
You will be prompted for the PFX import password when necessary.
Common OpenSSL PFX Conversion Errors and Their Solutions
Sometimes, you may encounter errors while converting a PFX file into PEM and KEY files.
Below are some common problems and their solutions.
1. Error: Unable to Load Private Key
This error may occur if the PFX file is corrupted, the wrong password is supplied, or the file does not contain a private key.
Solution:
First, check whether OpenSSL can read the PFX archive:
openssl pkcs12 -in certificate.pfx -info -noout
Enter the correct PFX password when prompted.
If the archive does not contain a private key, you cannot extract one from it. You will need the original private key or a new certificate export that includes the private key.
2. Error: Mac Verify Failure
You may receive an error similar to:
Mac verify error: invalid password?
This usually indicates that the supplied PFX password is incorrect or that the archive has an integrity problem.
Solution:
- Verify the password.
- Check whether the PFX file was transferred correctly.
- Confirm that the file is not corrupted.
- If necessary, request a new PFX export from the certificate administrator.
Do not bypass the integrity check simply to force the extraction.
3. Error: Unsupported Algorithm in OpenSSL 3
Some older PFX files use legacy encryption algorithms that are not enabled by default in OpenSSL 3.
You might encounter an error mentioning unsupported algorithms or legacy ciphers.
Solution:
If you trust the source of the PFX file and need to read an older archive, try adding the -legacy option:
openssl pkcs12 -legacy -in certificate.pfx -nocerts -noenc -out server.key
For the certificate:
openssl pkcs12 -legacy -in certificate.pfx -clcerts -nokeys -out server.pem
Use legacy mode only when necessary, and avoid using it as a general solution for newly generated certificates.
4. Error: OpenSSL Is Not Recognized on Windows
If you see:
'openssl' is not recognized as an internal or external command
Windows cannot locate the OpenSSL executable.
Solution:
- Verify that OpenSSL is installed.
- Locate the OpenSSL
bindirectory. - Add that directory to your Windows PATH environment variable.
- Restart Command Prompt or PowerShell.
- Run
openssl versionagain.
Alternatively, execute OpenSSL using its full executable path.
5. The Extracted PEM File Contains Extra Information
Sometimes, an extracted PEM file contains additional information such as bag attributes.
This information is not necessarily an error. PEM parsers commonly ignore non-PEM metadata surrounding certificate blocks, but some applications may have stricter requirements.
Solution:
Inspect the PEM file and ensure it contains a valid certificate block:
-----BEGIN CERTIFICATE-----
If your application requires a clean certificate-only PEM file, you can re-export the certificate using the OpenSSL command:
openssl x509 -in server.pem -out clean-server.pem
This writes the certificate in a clean PEM representation.
Frequently Asked Questions (FAQs)
1. Can I split a PFX file into PEM and KEY files using OpenSSL?
Yes. OpenSSL can extract the SSL certificate and private key from a PFX file using the pkcs12 command.
Use:
openssl pkcs12 -in certificate.pfx -nocerts -noenc -out server.key
To extract the certificate:
openssl pkcs12 -in certificate.pfx -clcerts -nokeys -out server.pem
2. Does this method work on Windows 11?
Yes. The same OpenSSL commands work on Windows 11 and Linux. The main requirement is that OpenSSL must be installed and accessible through Command Prompt, PowerShell, or your terminal.
3. What is the difference between PFX and PEM?
PFX is a PKCS#12 archive format that can bundle certificates, private keys, and certificate chains into one file.
PEM is a text-based encoding format that can store certificates and private keys. It is commonly used by Linux web servers and applications.
4. Can I extract a private key from a PFX file without a password?
Not normally. If the PFX archive is password-protected, you generally need its correct password to access the protected contents.
Without the password, you should obtain the correct credentials or request a new certificate export from the administrator.
5. Is the extracted KEY file sensitive?
Absolutely. A KEY file normally contains your private cryptographic key.
Do not upload it to public websites, share it through unsecured communication channels, or commit it to public Git repositories.
Use restrictive file permissions and secure storage.
6. Can I use the extracted PEM and KEY files with Nginx or Apache?
Yes. Nginx and Apache commonly support separate PEM-encoded certificate and private key files.
The exact configuration depends on your server version and certificate-chain requirements.
Make sure you configure the correct certificate chain and private key paths before restarting your web server.
7. Can I convert PFX to CRT and KEY instead of PEM and KEY?
Yes. A CRT file can contain the same PEM-encoded certificate as a PEM file. The filename extension alone does not determine the certificate encoding.
You can extract a certificate with a .crt extension using:
openssl pkcs12 -in certificate.pfx -clcerts -nokeys -out server.crt
Similarly, you can extract the private key into a .key file using the earlier command.
Conclusion
Splitting a PFX file into separate PEM and KEY files using OpenSSL is a straightforward process on both Windows 11 and Linux.
You only need to install OpenSSL, locate your PFX file, and execute the appropriate commands to extract the private key, SSL certificate, and optional CA certificate chain.
To summarize, the most important commands are:
Extract the private key:
openssl pkcs12 -in certificate.pfx -nocerts -noenc -out server.key
Extract the SSL certificate:
openssl pkcs12 -in certificate.pfx -clcerts -nokeys -out server.pem
Extract the CA chain:
openssl pkcs12 -in certificate.pfx -cacerts -nokeys -out ca-chain.pem
With these commands, you can easily convert a PFX certificate into separate files required by various web servers, hosting platforms, and applications.
Always remember to protect your extracted private key and verify that the certificate and key match before deploying them in a production environment.
Discover more from 9Mood
Subscribe to get the latest posts sent to your email.





0 Comments